These days, just about everyone uses an Integrated Development Environment (IDE) for their programming — even for silly command line programs. Back in the day, however, the command line was where programming took place.
In fact — and this isn’t really a secret — the IDE is still using the command line to create programs. An IDE is simply a method of expediting what was once done (and is still done) at the command line.
You can use the command line to write code, anything from a teensy I/O filter to an operating system. All the tools are available, honed to perfection over the years. If not, they’re easily obtained free on the Internet:
- MinGW is available for the PC at http://www.mingw.org/
- On the Mac, you can get
clangand other tools by downloading the XCode development package from the App Store. - Your Linux distribution comes with all the programming tools, although they may not be installed automatically. (They usually are.)
You follow three simple steps to create a program at the command prompt:
- Use an editor to create the source code.
- Compile and link.
- Run and test.
These steps are fast. So much so that nearly all the C code you see on this blog was created that way. (Occasionally I use an IDE, especially to demonstrated debugging concepts, but even that can be done at the command line.)
Naturally, when your code grows more complex, say a multi-module project or something that links in lots of libraries, setting things up in an IDE is a better proposition. Even then, armed with the proper tools, all that activity can take place at the command line.
The Editor
The terminal window is rife with editors, more so in Unix than in Windows. Any text editor will do. Some of the better ones even color-code the programming language. They might also automate indents and interpret other code hints as well.
I use the vim editor. It’s a modal editor, which drives some people nuts. You switch between editing and writing modes in a modal editor: Press Esc, edit, then insert text, press Esc, edit, and so on.
Non-modal editors are also available, including the popular emacs and its numerous variants.
As long as you write C code and save the source file as plain text with the .c filename extension, you’ve done the job.
The Compiler and Linker
I starting programming back when compiling and linking were separate steps. Today they’re combined into a single step, generally handled by the gcc command, although using clang is better.
The compiler/linker displays any warnings or errors, which you fix by using the editor. clang is very specific with its warning/error messages (Lesson).
The Test Run
To ensure that the code works, you test-run it: Type the program name at the command prompt. If it runs, great! If not, you repeat the cycle — edit, compile, run — to work out the bugs. Even when you don’t find any bugs, most programmers fine tune their code by editing again, which repeats the process.
A Specific Example
Start creating the program on the command line by writing source code — just as you would in an IDE. Instead of using an editor window, however, you run an editor on the command line. Use the editor to create or open the source code file:
vim prog1.cThe editor is vim. The source code file name is prog1.c.
In Figure 1, I’ve used vim to write a short program. It’s color-coded by the editor, as shown in the figure. The indents were added automatically. You also see the curly brackets are highlighted as a matching pair, which is another editor feature.
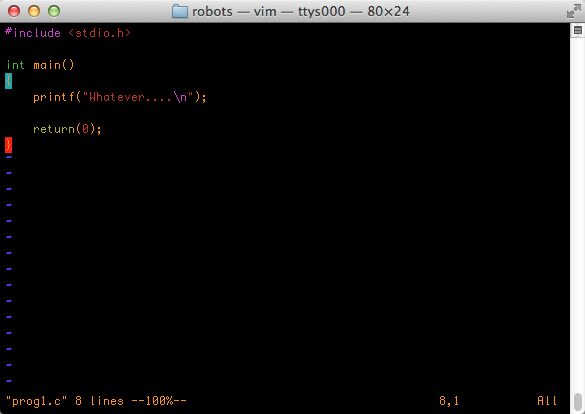
Figure 1. The vim editor creates source code.
Here is the code:
#include <stdio.h>

int main()
{
    printf("Whatever....\n");

    return(0);
}
Write the code. Save it. Quit the editor to return to the command prompt for compiling.
Some editors let you compile and link from within the editor, or you could run the compiler from another terminal window (which is what I did back in the day). Traditionally, you compile and link by using the cc command, but I use clang on my Mac:
clang -Wall prog1.cclang is the C Language compiler. The -Wall option activates all warning messages. And prog1.c is the name of the source code file.
In this example, the program created is named a.out (a.exe in Windows), the default program name. I could have specified a program name by modifying the clang command:
clang -Wall prog1.c -o prog1Above the -o option directs clang to name its output (the program) prog1 (prog1.exe in Windows).
The program created is an executable; it’s a full program recognized by the operating system. You don’t have to set file permissions or modify anything; the program is ready to run.
To run the program, type its name at the command prompt.
In Unix, you must specify the command path to run the code, which means prefixing the filename with ./ (dot slash):
./a.outOr
./prog1In Windows, just type the program name at the prompt, a or prog1.
The program runs, shown in Figure 2.
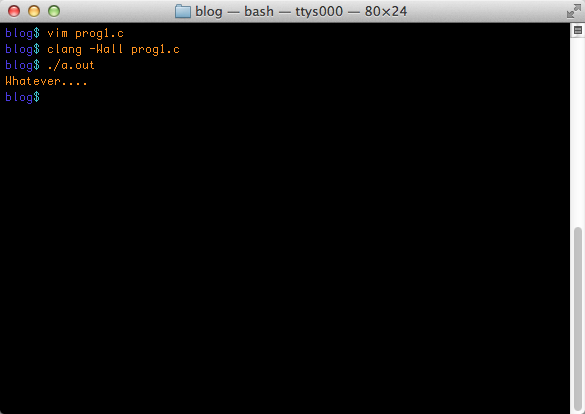
Figure 2. And the program is born.
At this point you can smile with glee that it runs and be done with it. If you discover any bugs, you can fix them by repeating the steps. And, naturally, many programmers never achieve satisfaction, so they return to the editor to fine tune the code and add features. That process never ends.